There is supposed to be a lovely photo that I took of an owl here, but for some reason, Blogger is not giving me the option of uploading it from my computer. I must say if I had to do it all over again..... think I might be looking at a different blog service!
Anyway, it has been a long time since I last posted to this blog, not sure what happened to the time, but I will tell you I got a lot done in the way of Christmas cards and gifts! My darling husband was getting a little worried, wondering if I would ever come out of my scrapbooking room again! I managed to make 2 books, a pair of slippers (those I knitted!), a framed 12x12 scrapbooked page, a tea dispenser and a mini album. All completed, and wrapped!
And now it's 2013, and time for some RESOLUTIONS.
1) Finish my current UFO afghan
2) Finish up my travel journals (I have a few unfinished ones hanging around)
3) No impulse shopping for scrapbooking/stamping/crafting items!
Okay, that's enough.
Here's to a happy and healthy 2013!
Until next time.....
Wednesday, January 9, 2013
Thursday, November 22, 2012
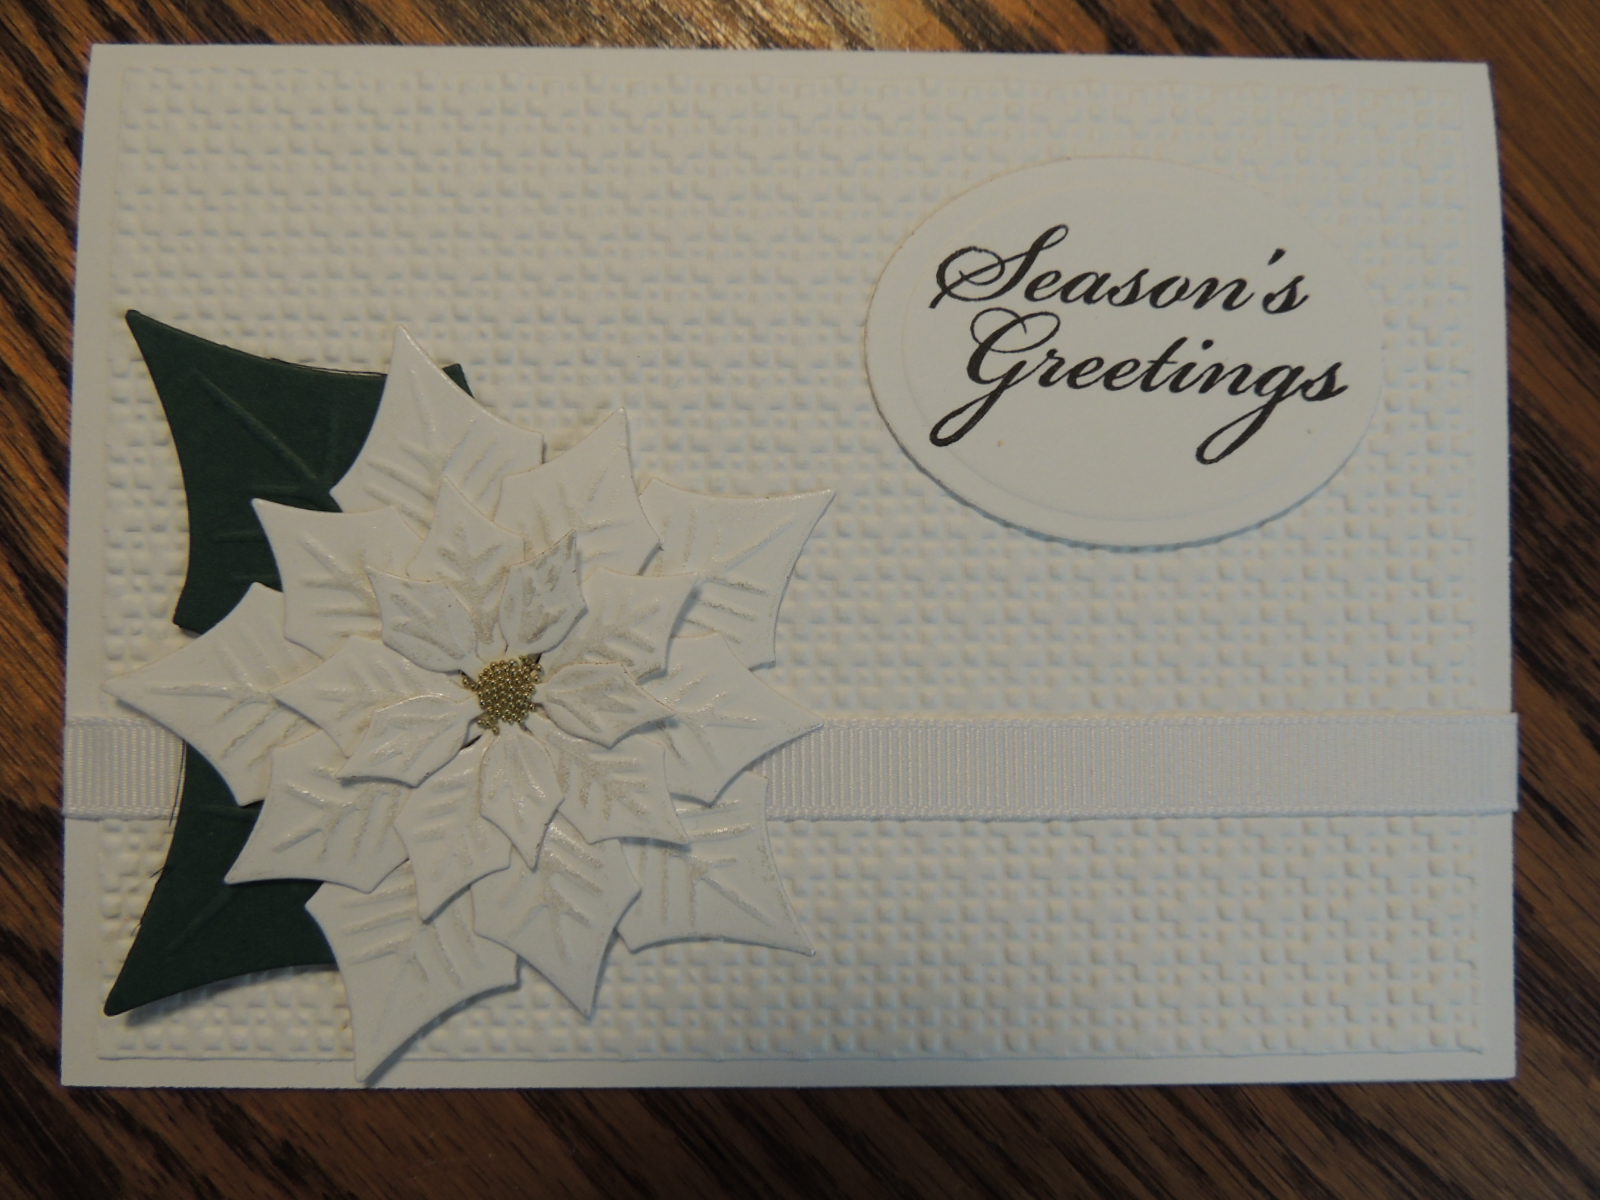
White Christmas
 With these thoughts in mind, I concluded that my cards would need
 to:
1) Be quick to make
2) Use inexpensive materials
3) Not look quick and easy
I went onto the internet looking for inspiration, and saw quite a few designs for "white on white" cards. What a great idea! Not only did I have white cardstock, it saved me from the AGONY of paper selection, plus it looks classy! Luckily I had some green cardstock for the leaves, so I didn't have to leave the house to buy any additional supplies! (Apart from the white ribbon, once I discovered I only had enough to make 4 cards).
The background was stamped using a Stampin' Up embossing folder. The poinsettia and label are both from Spellbinders. The glimmer on the poinsettia leaves is Lumiere paint (pearl white), and centres are mico beads.
Of course, I still have all that Christmas paper left.....
Thursday, November 15, 2012
Calendar Considerations

I won't go into how nice the papers are, or what I'm going to do in regards to layouts (to be honest, I don't have a clue at this time!). If I'm lucky, I'll be starting it in late December. I still have to figure out some way to bind the pages together, which brings me to my next point.
Graphic 45 does have a Easle Albums for 12x12 or 8x8 layouts. I almost bought one, until I realized SOMETHING. The monthly foundation pages are 8x8 or 12x12, the exact same size as the easle album base pages, which includes the wire binding. This means that you would either have to trim the foundation page borders off to fit the papers (not going to do that!) or figure out some way to undo the binding, cut binding holes in the foundation paper, and rebind it (way too much work). I notice that the easle albums are not shown on the G45 webside with the Place in Time papers, so maybe they didn't intend them to be used together. I'm thinking I may just cut some kraft paper 8 1/2" x 8", and bind it myself with my Bind-it-All.
Now I just have to decide on what photos to use....
UFO UPDATE: The afghan is coming along nicely, but I have put it aside for now to work on Christmas cards (yes, for this year!). I have made 16 cards so far (from kits, which should have made things quick and easy, but it didn't) and hope to make a few more with designs I have scrap-lifted from the internet. No more kits. Too many directions to follow.
Until next time....
Wednesday, October 17, 2012
Another Card - Not Hallowe'en!

Don't worry, I still give out candy to trick or treater's (even the older ones, but that could be just so they don't vandalize my house later) and I have a lovely plastic pumpkin I plug in and put in the window.
As I cruise the blogs and websites in cyberspace, I see a lot of Hallowe'en inspired cards, pages, tags..... so I thought I would do a seasonal looking card with nary a skeleton or witch in sight. Just some nice oranges, browns and greens.
The flowers are coloured with Copics, and die cut with Spellbinders. The butterfly is a 3D embellishment from K and Company. The ribbon is Basic Grey (I've had it for years, don't know if you can still buy it anymore or not.) You can't see it in the photo, but I added a little orange Stickles to the flower petals with a paint brush. The paper is also from Basic Grey.
I know this is a simple looking card, but it has 3 great advantages: 1) Apart from the Stickles drying time, it's quick to make. 2) It's not lumpy and bumpy and it fits in a regular envelope so it can be mailed. 3) It doesn't have any heavy embellishments, and it doesn't cost extra postage.
Until next time....
Saturday, October 13, 2012
Alaska Journal

Usually I use my Bind-it-All to make journals, but this time I thought I might try coptic binding. This is binding pages together by sewing them with linen thread. I won't go into the how's of coptic binding, as there are many internet sites that show you in great detail. That's how I learned to do it. I will give you a few tips though:
 1) Make sure your thread is long enough. I followed a mathmatical equation for calculating thread length, and it was too short. I was not happy, because I had to redo the whole thing.I don't know if there is a way to add on to the thread and keep it looking neat.
2) Don't pull the thread too tight. If you do, the book won't stay closed. It has to be tight enough to keep the signatures (that's coptic-speak for the page sections) from flopping about, though. (A few more choice words were said as I redid the binding again)
The papers I used were Graphic 45 from the Rennasance Fair collection. The flowers were punched from Memory Box and Sizzix dies. Letters were punched using Quickutz Metro alphabet. I embossed black cardstock with a clock embossing folder, then put some gold highlights on it.
Until next time...
Wednesday, October 10, 2012
Better Late than Never

Anyway, I did not much like knitting the flying geese (moss stitch is not fun, and there were way too many yarn ends to sew in!), and I have replaced those panels with squares of garter stitch.
This is only the first 3 panels stitched together, I still have 2 more garter stitch panels to go!
Missing in Crafting
I have been struggling for the past 15 minutes trying to get a photo of my most recent craft project uploaded. I'm getting a message, "Server Returned Invalid Response". What does that mean?
It has been some time since I last posted to this blog, I will say the last few months have been quite difficult and stressful, and blogging has taken a back seat to the events going on. Everything from family illness to a vacation (complete with a terrible cold and a sprained ankle!) to changes at work have really diverted my attention.
But this last month I have been working my latest UFO, the afghan. I've had quite a bit of time, what with having to take it easy and keep off my poor ankle. I have taken great comfort in it's soft texture and vibrant colours. It's pretty simple, alternating ecru patterned strips with coloured blocks in garter stitch, which makes a good take along project, and I can even watch TV and not mess up the pattern too badly!
I also made a journal for our trip to Alaska, using coptic binding (not to be confused with Copic markers!!) Hopefully one day the server will allow me to upload a photo or 2!
Until next time, which hopefully will be sooner than last time.....
Subscribe to:
Posts (Atom)